LA Magazine Los Angeles Magazine’s Best Physical Therapy Practice in LA

Pronation Part I – What is pronation I

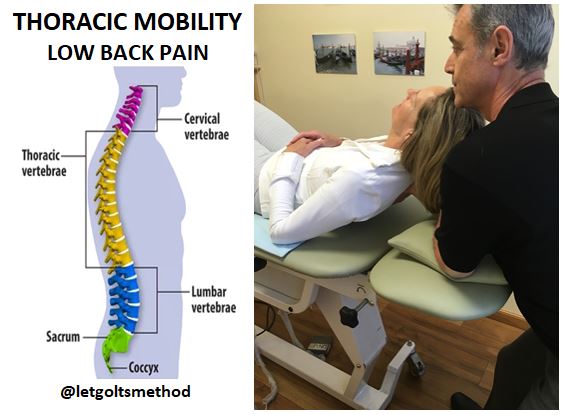
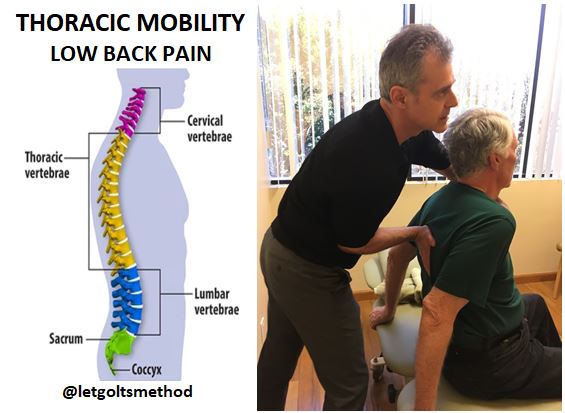
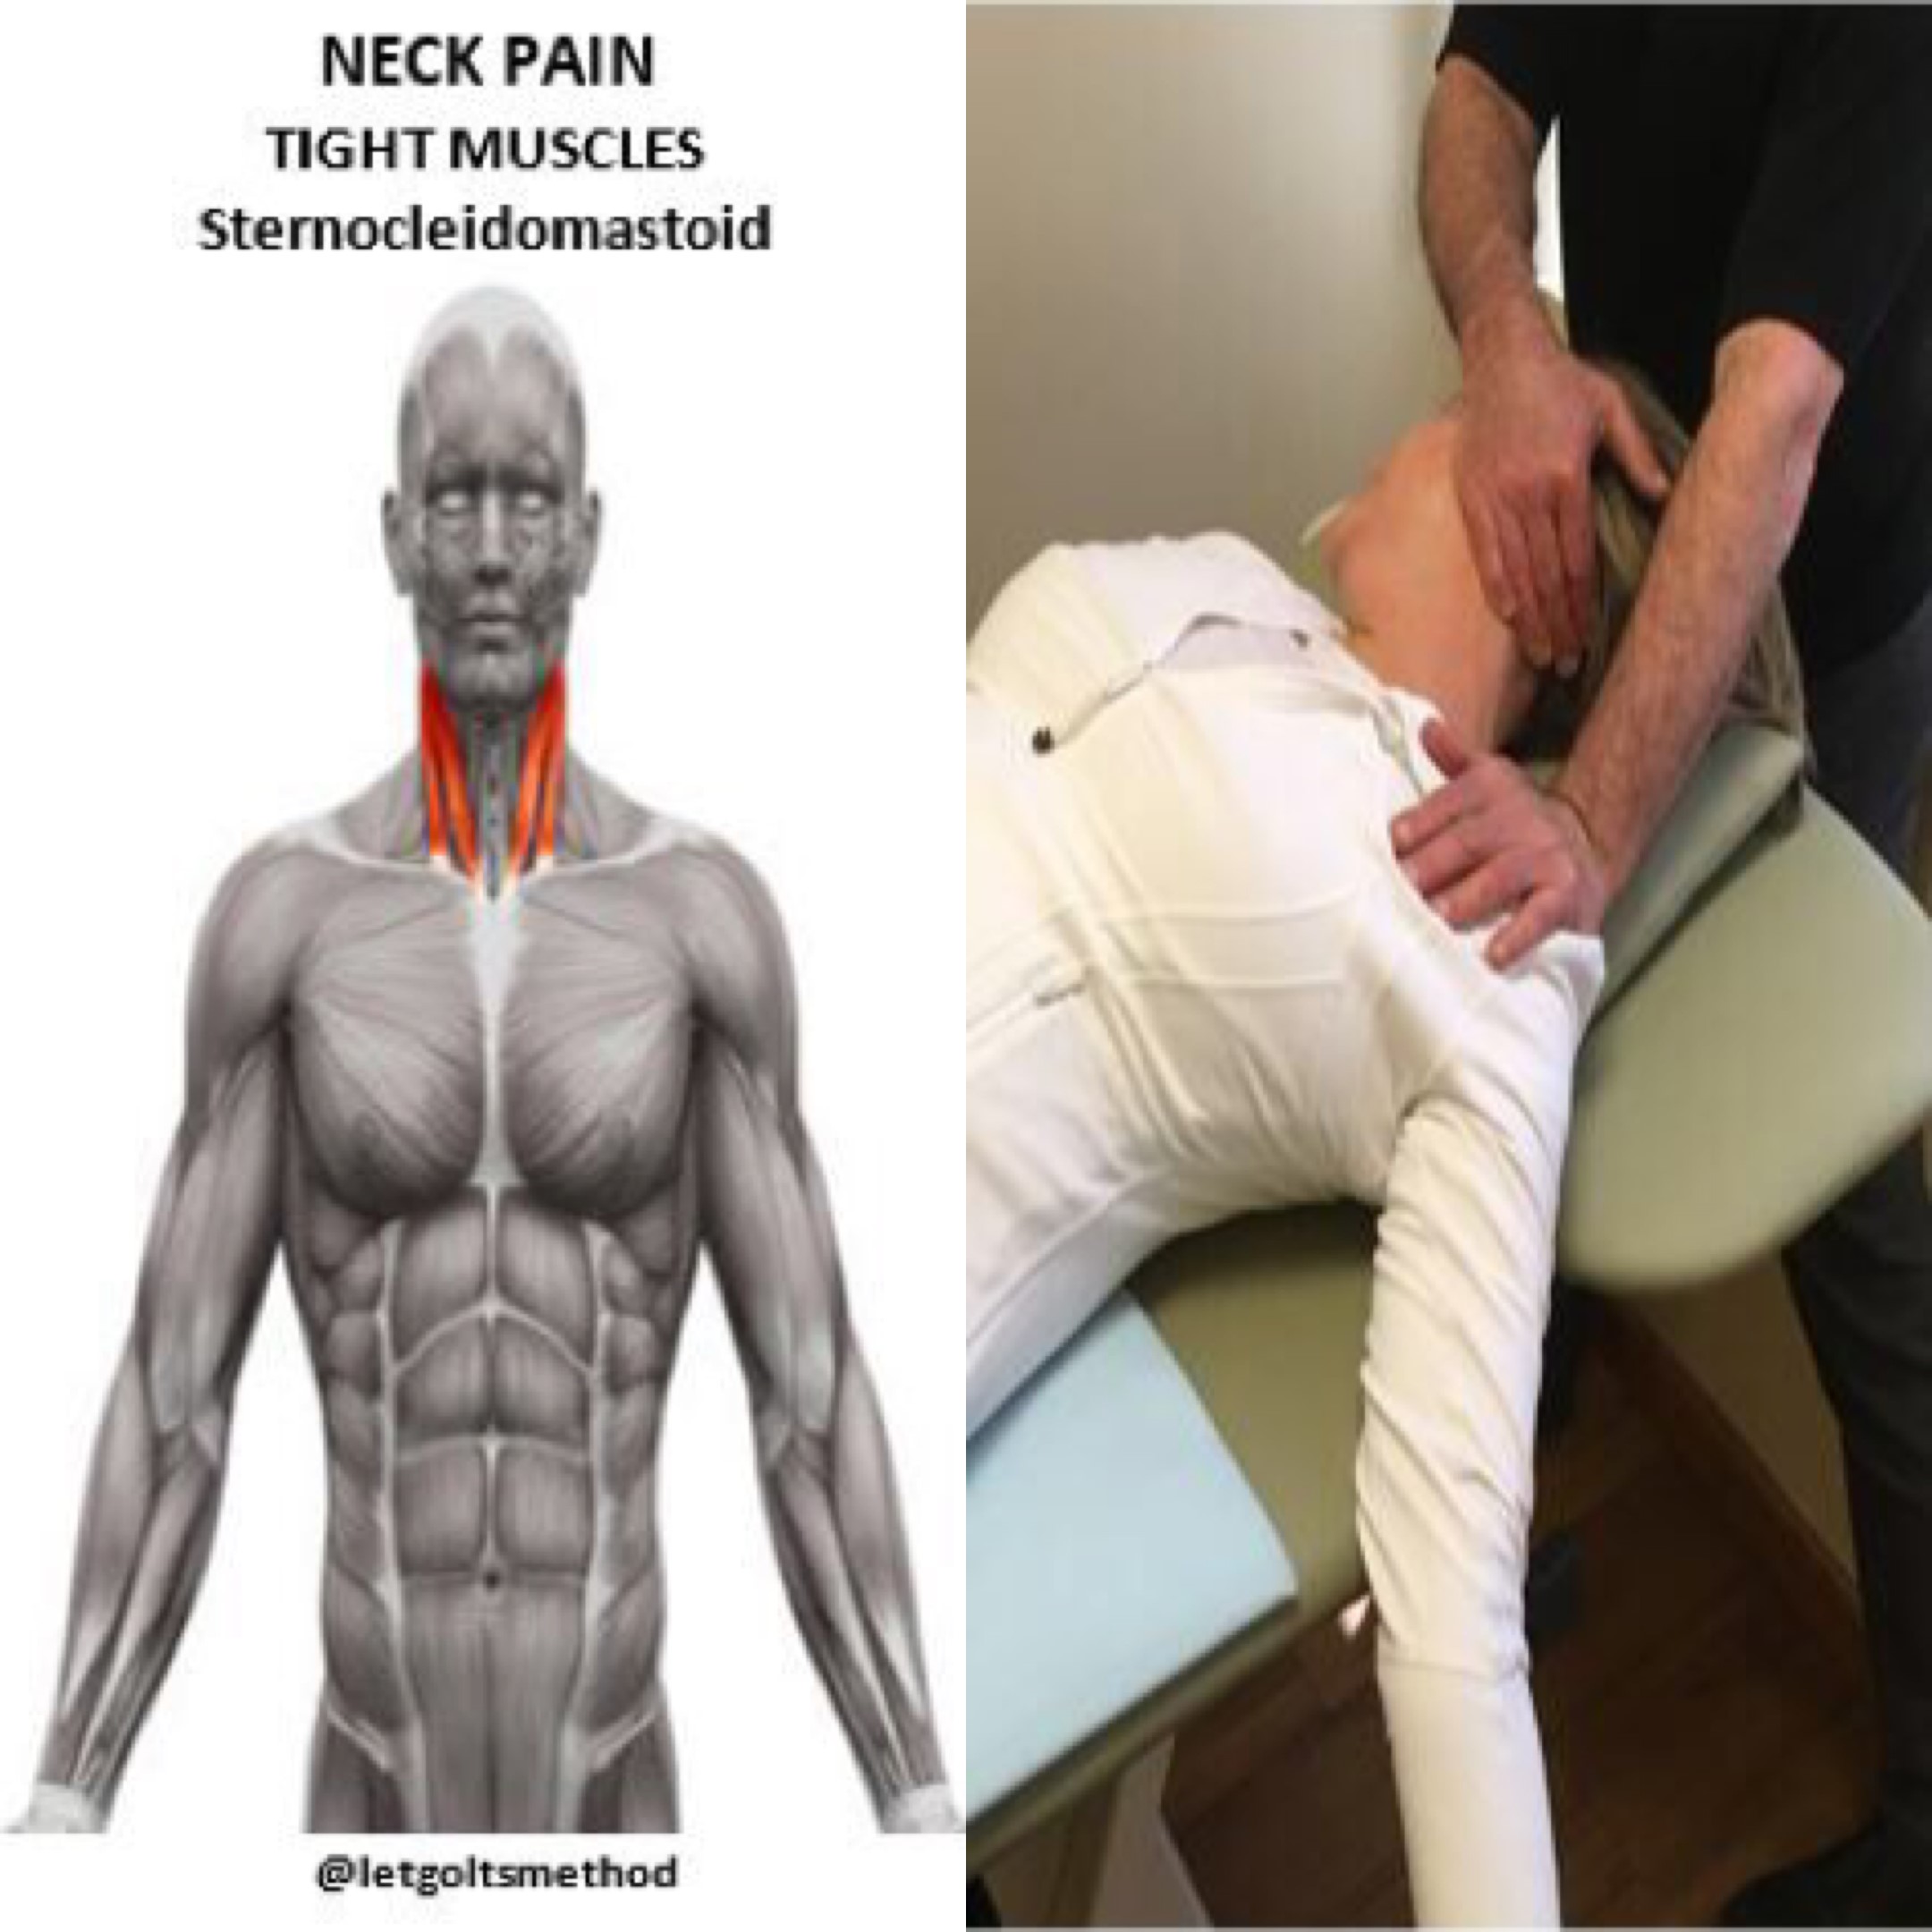
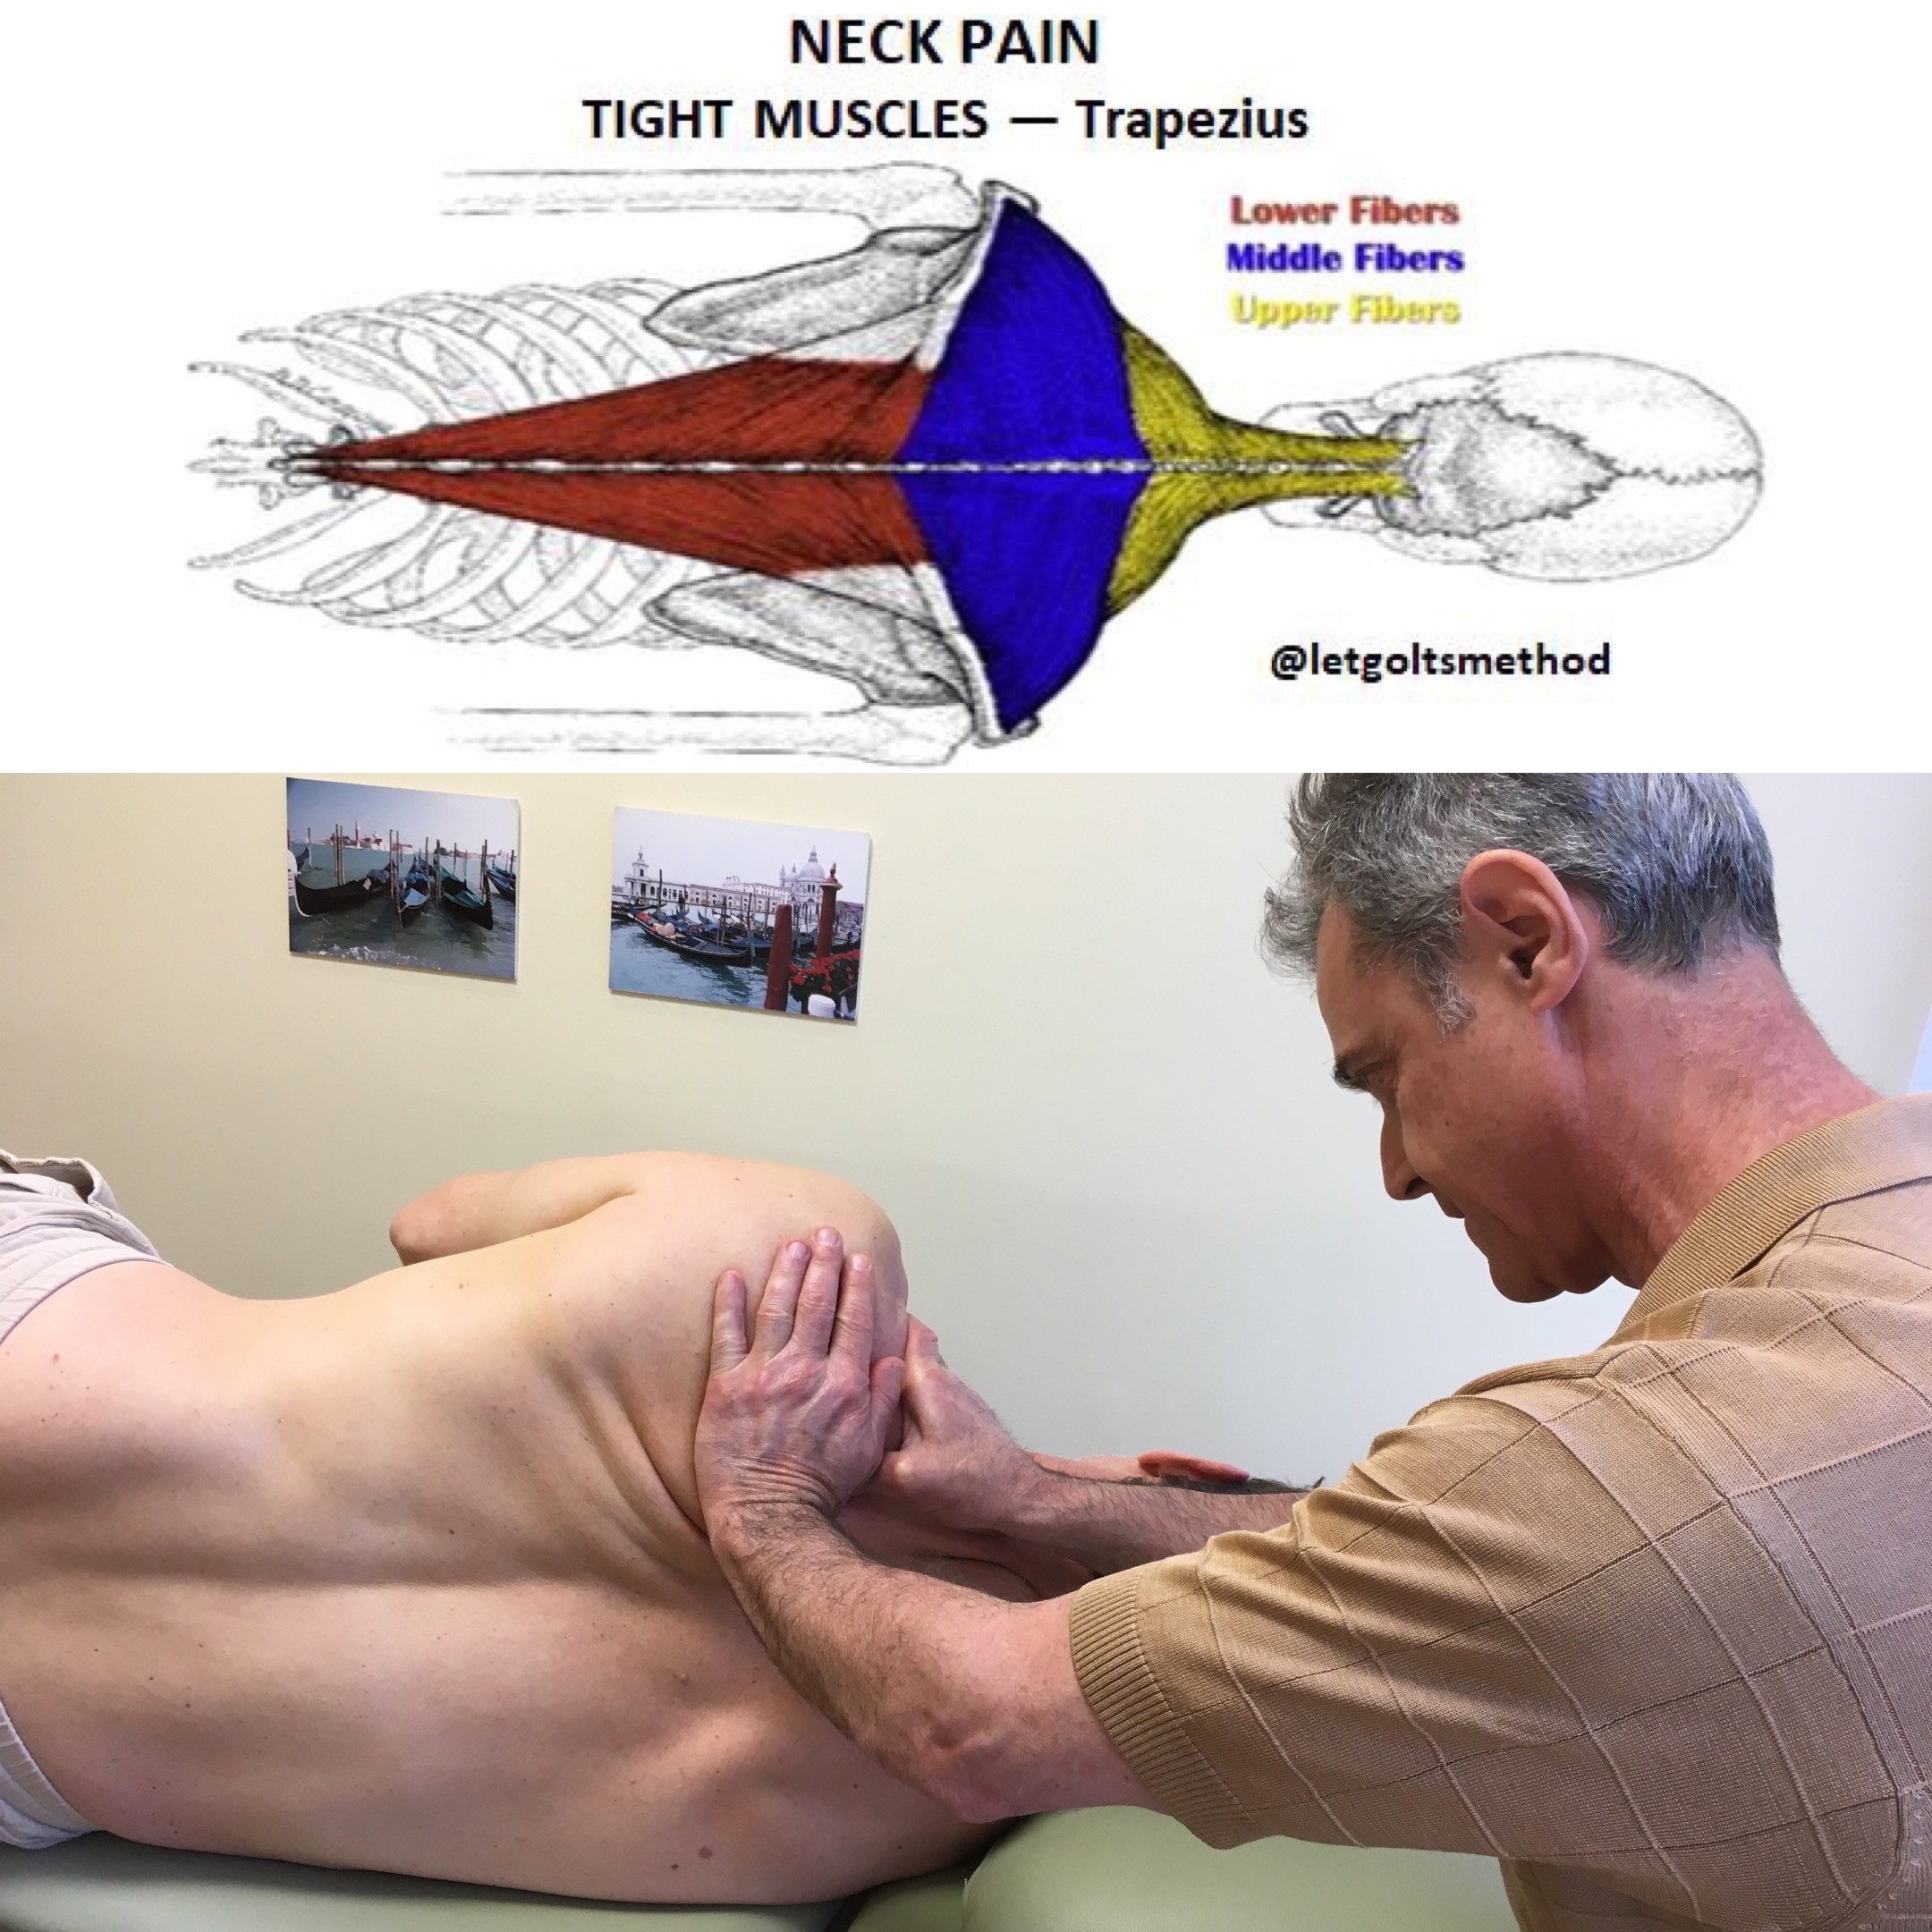
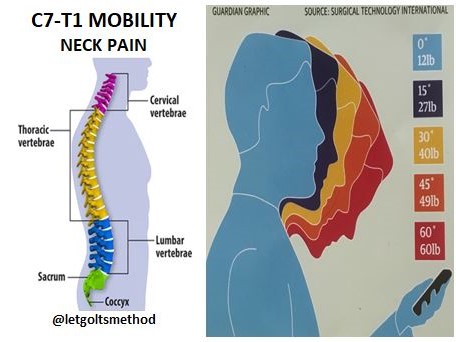
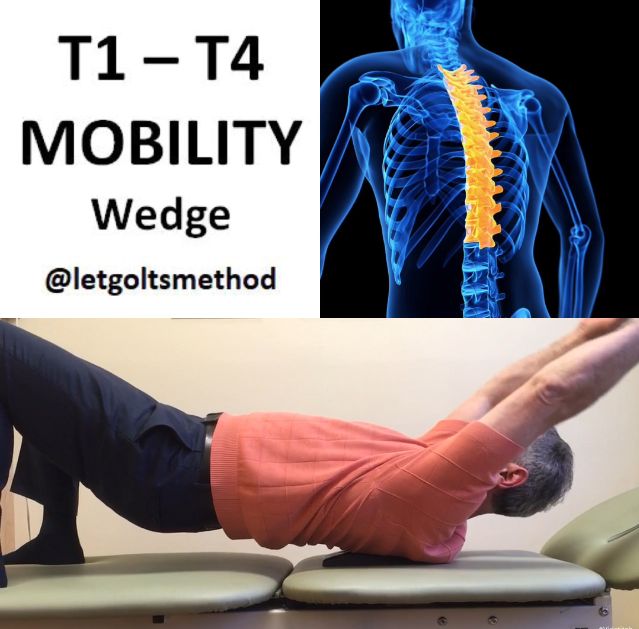
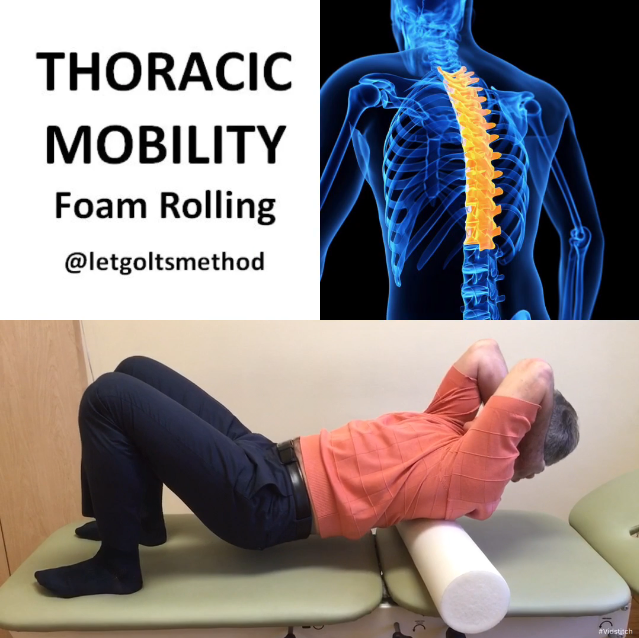
Up till now, our posts have addressed stiff upper backs, tight muscles, and certain postures that can contribute to chronic neck and/or low back pain. However, what we haven’t addressed is WHY the thoracic spine gets stiff and WHY those muscles get tight. More specifically, what causes them to end up that way and what causes your body to end up in the same position time and time again.

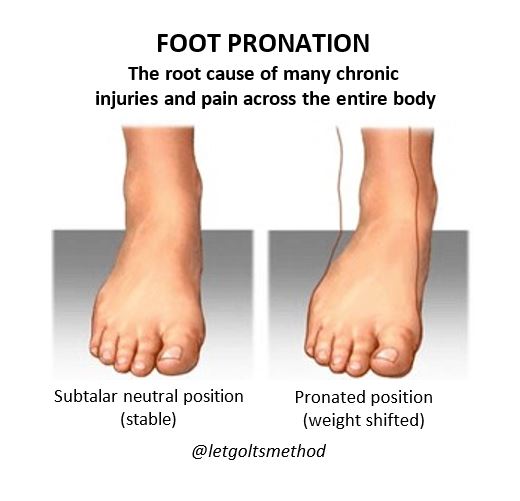
The answer? YOUR FEET! More specifically, pronation: the inward rotation of the foot when weight bearing. This forces the weight onto the inside of the foot, as opposed to being evenly spread when the foot is in a subtalar neutral (stable) position, as seen in below:

Pronating also often comes with a flattening of the arches, which shouldn’t be confused with flat feet (to be covered later on). As the foot pronates, the knee rotates internally, (represented in the video links below).

Pronation 1_3_pronation anterior view

Pronation 1_4_pronation posterior view


When this happens on both sides of the body, the hips will drop into anterior pelvic tilt. Once that happens, the body’s weight will begin to shift forward. In order to keep ourselves from falling forward, the lower back will extend backwards to maintain the center of gravity. In order to keep the center of gravity in line with the hips, the thoracic spine becomes curved while the shoulders round out. More often than not, the head will also be shifted slightly forward (“turtleneck” position).

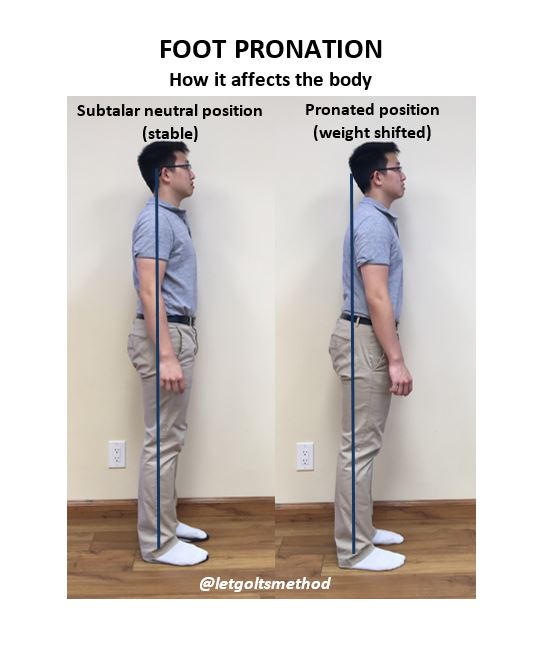
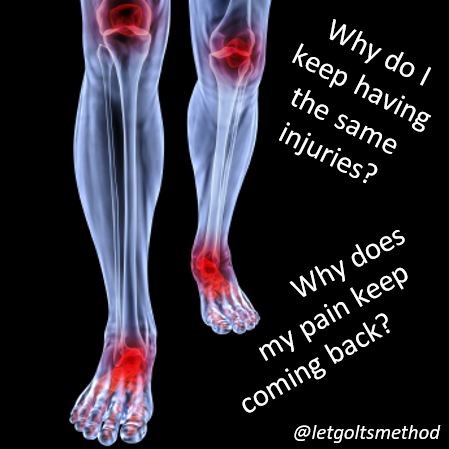
Here you can see how the body’s posture is affected by pronated feet vs feet set in subtalar neutral. The posture caused by pronation worsens over time as joints become stiffer and muscles become tighter. This chronic posture is why many people find it hard to simply sit or stand up “straight” and maintain that posture, as well as why many lower extremity injuries persist. It has nothing to do with how strong or weak the muscles are, but rather, with how their body compensates as a result of its structure – i.e., the bone structure of the foot having a bottom-up effect on areas higher up on the body.

Supine Thoracic Spine Mobilization

This mobilization for the thoracic spine involves the palm placed behind the stiff thoracic segments of the patient’s spine, while the other hand is used to support the patient’s head and take strain off the cervical spine. For this mobilization, we’re using the heel of the palm as a fulcrum and taking advantage of gravity to help facilitate movement and get those stiff segments to move.

Having the patient bring her arms up into flexion will help further facilitate extension of the thoracic segments, as the vertebrae naturally extends when the arms are brought over head. While the static mobilization shown in the first image is enough to aid in extension, this dynamic movement allows for a more effective mobilization.

Supine T-spine mob_arm flexion/extension

For patients who have exceptionally stiff thoracic spines and are more sensitive to something placed against the vertebrae to act as a fulcrum, this mobilization can be modified by having the patient on a sitting position. Dr. Letgolts can be seen pushing into the stiff segments (posteriorly -> anteriorly), while having the patient simultaneously lift up the chest and the chin. This action mimics the shoulder flexion that’s accompanied by thoracic extension.

Brentwood Physical Therapy

Neck Muscles Stretches

Quite often when patient complain of constant neck pain, the root cause can be traced back to a stiff C7-T1 junction. However, the muscles around the neck—sternocleidomastoid (SCM), scalenes, upper trapezius—will tighten up and get locked in as well when C7-T1 becomes stiff over time. Therefore, once the C7-T1 junction is mobilized, the surrounding neck muscles must be stretched and loosened up, otherwise the head will end up stuck in a forward position and the neck pain will return.

(1) When both SCM muscles contract, the head is flexed forward, so tightness on both sides exacerbates forward flexion of the neck at rest. When the SCM on one side contracts, the face is turned to the opposite side. Therefore, when stretching out the SCM, it’s important to remember to tilt the head back and anchor the SCM while moving the clavicle and upper ribs downward (inferiorly) to release the muscle.

(2) While the scalenes are responsible for forward flexion of the neck, they also elevate the ribs. Therefore, if these muscles remain tight, they not only pull on the cervical vertebrae back into flexion, but also elevate the first two ribs. Since the first two ribs attach to T1 and T2, respectively, chronically tight scalenes will lead to stiffness in the C7-T1 junction that’s likely to spread down the upper back. During this mobilization, Dr. Letgolts anchors the inferior portion of scalenes and uses the upper rib rotation caused by the arm movement to increase the stretch.

Scalene stretch

(3) Since the upper traps are primarily involved in the elevation of the scapula, an upper trap stretch is fairly straightforward. However, keep in mind that the scapula should be kept in a retracted position (against the ribcage) as shown, to get a more effective stretch—this would also hit the levator scapulae.


Key takeaway: the root cause of someone’s pain is often multi-faceted. It isn’t enough to simply deal with joint stiffness or muscle tightness. As both are very closely related, it must be important to address both issues in order to achieve longer-lasting results.

C7-T1 Mobilization

Apart from chronic low back pain, one of the other common complaints our patients have is chronic neck pain. When the t-spine no longer moves well, the c-spine will compensate by working even harder to produce the same movements necessary to bring the head up so we can look forward. Most of this translates to excessive hinging at the C7-T1 junction, where the cervical spine (neck vertebrae) meets the thoracic spine (upper back). Over prolonged periods of time this gets overworked and eventually, the strained C7-T1 junction will get stiff as well, since it isn’t meant to undergo that about of stress.

As the desk life becomes more prominent and people spend more time in front of a computer screen or on their phones, chronic neck pain becomes more common as well. Our positions during screen-time can exacerbate the symptoms, as more strain is put on the neck to support the weight of the head when it juts out beyond the shoulders—this strain increases as the head tilts further forward. Therefore, it’s important to understand that the position we spend our time in for prolonged periods will certainly affect our symptoms. However, that’s not to say neck pain is caused solely by “bad posture.” It has more to do with the inherent anatomy and structure of one’s bones, but more on that later.

The key to relieving most cases of chronic neck pain starts with the mobilization of the C7-T1 junction, so the head can be positioned back over the shoulders. This removes a lot of the additional strain put on the neck, as the compensations for stiff joints is removed and the head is able to rest properly on the spine for support. Here we can see the active mobilization of the C7-T1 junction, where the patient is participating in the mobilization. As Dr. Letgolts pushes with his thumbs on the stiff segments in a posterior –> anterior direction, the patient lifts her head and chest up to help facilitate extension of the thoracic spine.

C7-T1 Mobilization_ lateral view

C7-T1 Mobilization_posterior view


back pain Westwood

Thoracic Spine (T1-T4) Mobilization

The wedge is often used by professionals to mobilize—i.e., crack—patients’ backs. However, wedges can also be used for self-mobilization. This is a variation of the foam roller mobilization that was posted on Wednesday. For patients who have especially stiff upper thoracic spines, the wedge offers a more aggressive alternative to self-mobilize with when compared to the foam roller. Since T1 – T4 are very hard to mobilize on a foam roller, using a wedge also allows for a more specific placement of a fulcrum, to target those segments that get stiff.

Thoracic Spine (T1-T4) Mobilization – Wedge

What to do:

  1. Find the stiff segments in the thoracic spine
  2. Lie back on the wedge with the edge against the stiff areas
  3. Gently lean backwards over the wedge while supporting the head
  4. Bring both arms up over the head
  5. Move the arms up and down 10-12 times.


The up-and-down movement of the arms combined with the wedge acting as a fulcrum helps further mobilize the thoracic vertebrae as the t-spine naturally extends with flexion of the arms.

For those who don’t have access to a wedge, the same mobilization can be achieved with a foam roller placed lengthwise along the spine, with the end of the foam roller acting as a fulcrum against the upper T-spine. With this variation, it’s important to use both hands to support the head as you’re coming down onto the foam roller and coming up off of it, as seen in the video. A pillow can also be placed under the head to elevate it if too much pressure is felt with the head resting on the ground. See the video below:

Thoracic Spine (T1-T4) Mobilization – Foam Roller Variation

back pain Brentwood

Thoracic Spine Foam Roller Mobilization (General)

Thoracic Spine Foam Roller Mobilization (General)

Suffering from low back pain or neck pain? Mobilizing your thoracic spine on a foam roller may help! This is one of the most common exercises we teach our patients to help them improve and maintain their thoracic extension.


What to do:

  1. Lay down with knees bent and the foam roller placed horizontally underneath the upper back (t-spine)
  2. Start with the roller placed at the lower t-spine
  3. Place your hands behind your neck to support your head
  4. Point your elbows forward (away from your face)
  5. Gently bend backwards over the foam roller and hold briefly
  6. Come back off the foam roller (like a sit up motion) and gently bend backwards again
  7. Repeat for 10-12 reps
  8. Move the foam roller higher up on the t-spine and repeat in at least 3 different places on the t-spine (lower/mid/upper)


Key points:

  • Having the elbows pointed forward keeps the shoulder blades apart (protracted), allowing the foam roller more access to the vertebrae
  • Roller should be placed no lower than the bottom of the rib cage and no higher than C7-T1
  • You can move the foam roller higher up on the t-spine by rolling it up with your elbows or by scooting your bottom further down
  • As you move higher up, the foam roller may start to slide. You can avoid this by lifting up the hips to get a better placement on the foam roller.
  • Feel around for those stiffer segments and spend more time on those areas!
  • Keep the stomach tucked in and the abs tight to help prevent extension from the lumbar segments to get the most out of this mobilization!